Making fabric face masks for yourself, your family, and those in need is a great way to get through this challenging moment. It's given me a chance to clear out my fabric stash and connect (virtually) with my community to team up to help our local hospitals.
There are a million videos with different patterns. Since I am making A LOT of them I tried a few different versions before settling on this pattern from Make Everyday with Dana. I'm including her pattern with fabric ties made from old t-shirt material. I made one change as follows:
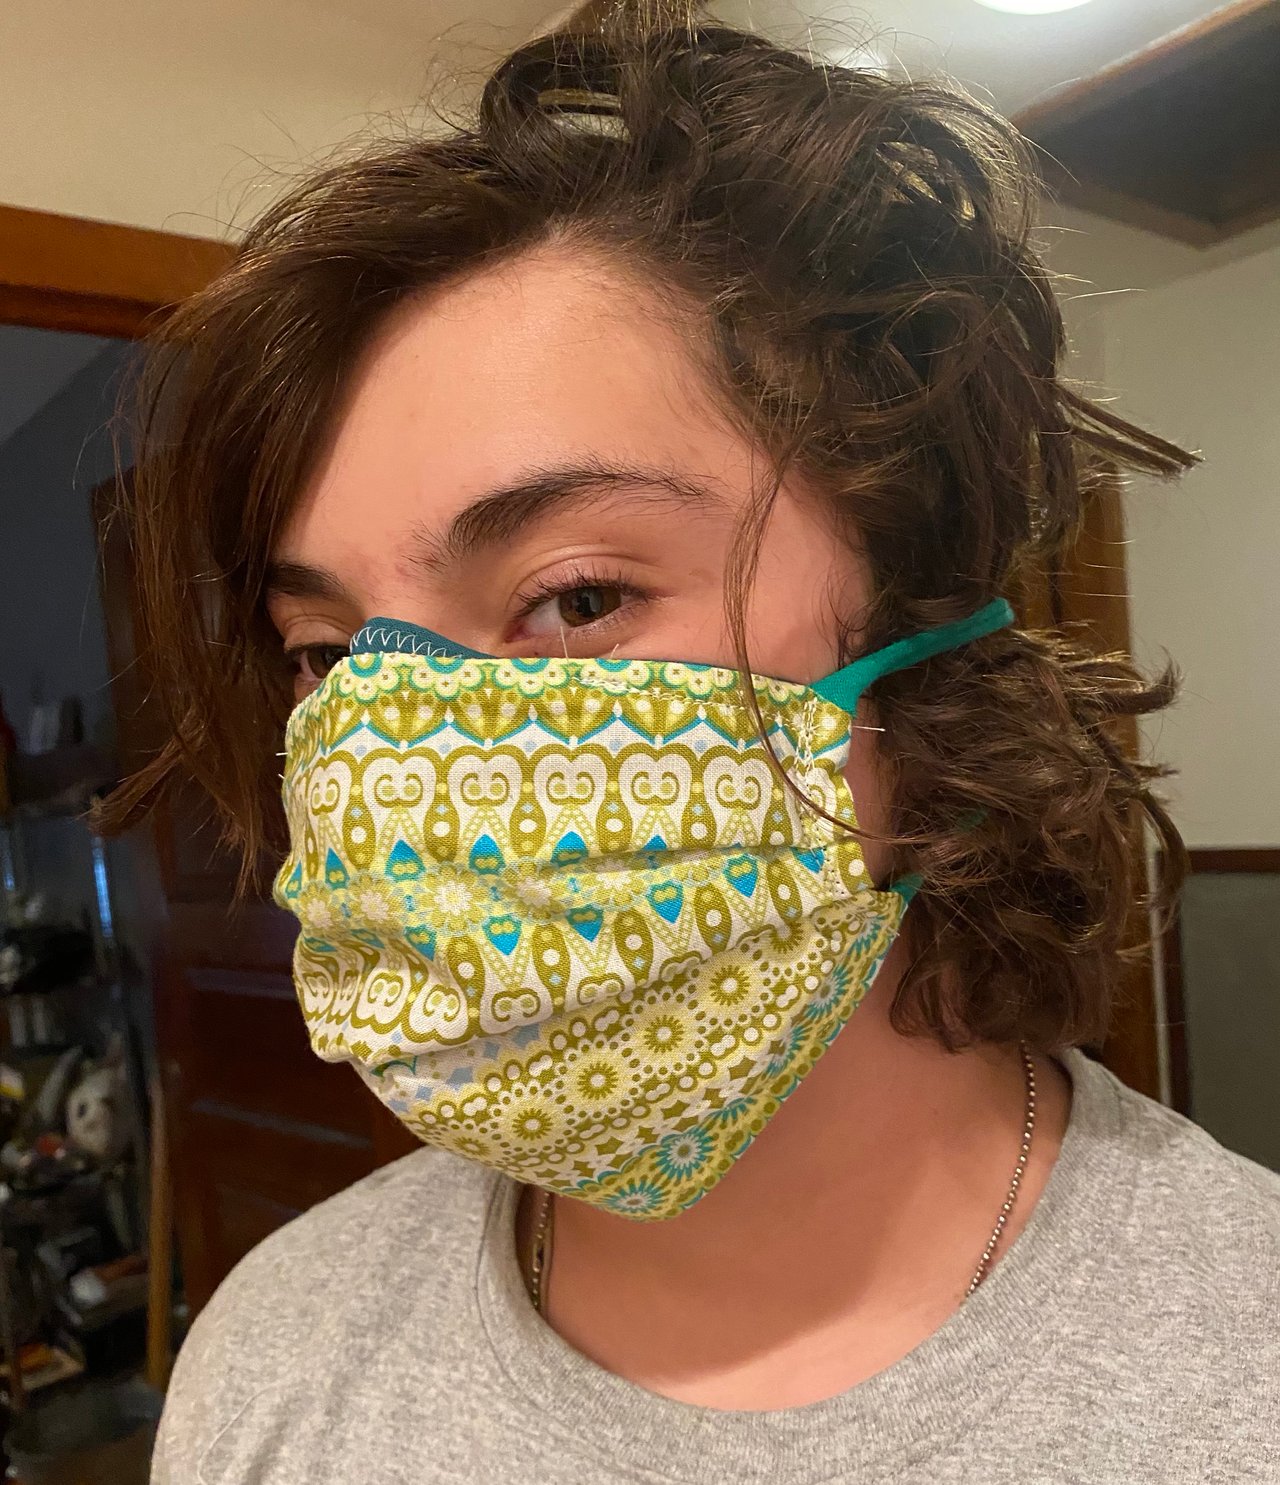
For the back fabric, I cut two 9 inch x 5-inch rectangles and folded down one long edge 1/4 inch, twice. Then I ironed that in place so I have a 9 inch x 4.5 inch rectangle with a nice folded edge Make sure to use two different fabrics for fronts and backs so the wearer can easily identify the correct way to wear.
With right sides facing, place the two small rectangles on the front rectangle which is 9" x 8" wide. The rectangles will overlap slightly. This will make the opening for a filter in the back of the mask instead of at the top. I thought this would be easier to insert, and quicker to sew.
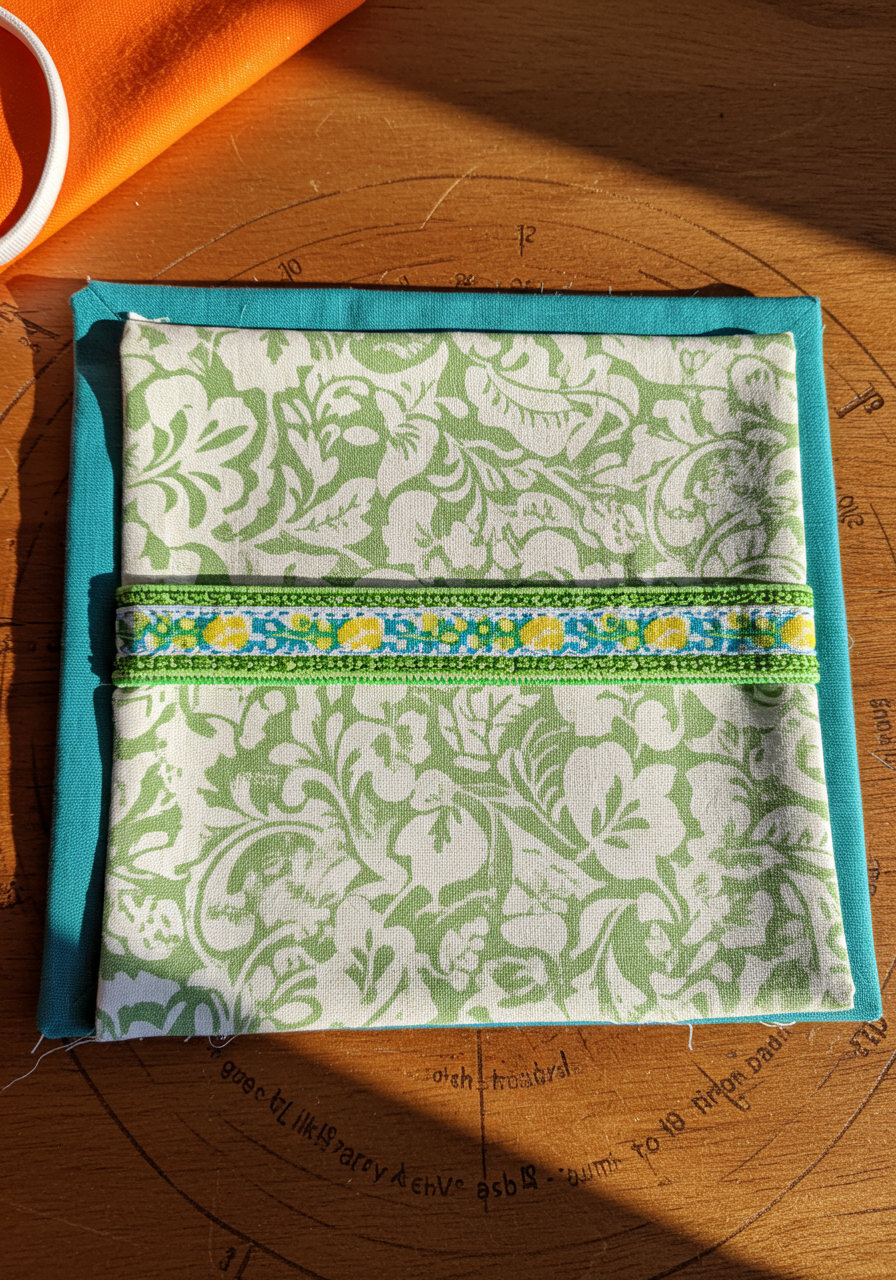
Cut your t-shirt ribbons into 18" lengths and pin one in each corner (on the INSIDE) of the fabric sandwich. Keep the long ends out of the way while you sew each 1/4" side seam. Now. make sure the long pieces are stuffed into the center of the sandwich and close up the top and bottom with a 1/4" seam.
Turn your make right side out and see how great you did!
If you are putting in a nose piece you can do it now or later.
If not move on to making the pleats.
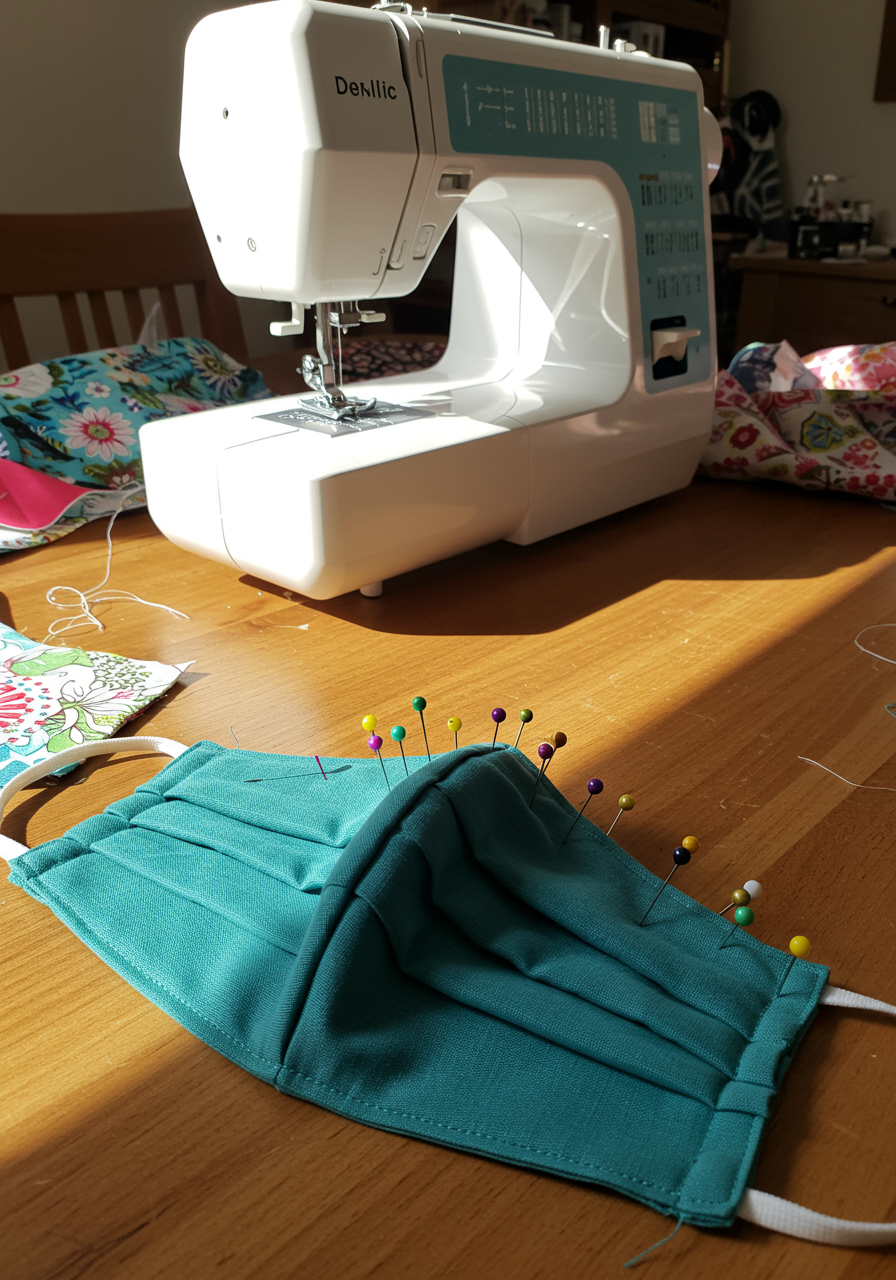
Don't worry about perfection here, make three folds in the fabric and sew them in place. Even if it doesn't look that great, this is what makes these fit, once they are expanded on a face, you'll see that pretty doesn't matter.
These are going to take a lot of abuse so the last step is to go back and topstitch the whole edge at least twice. Wash, dry, wear. Repeat. The pocket in the back is ready for whatever filter you can find: tissue, interfacing, paper towel.
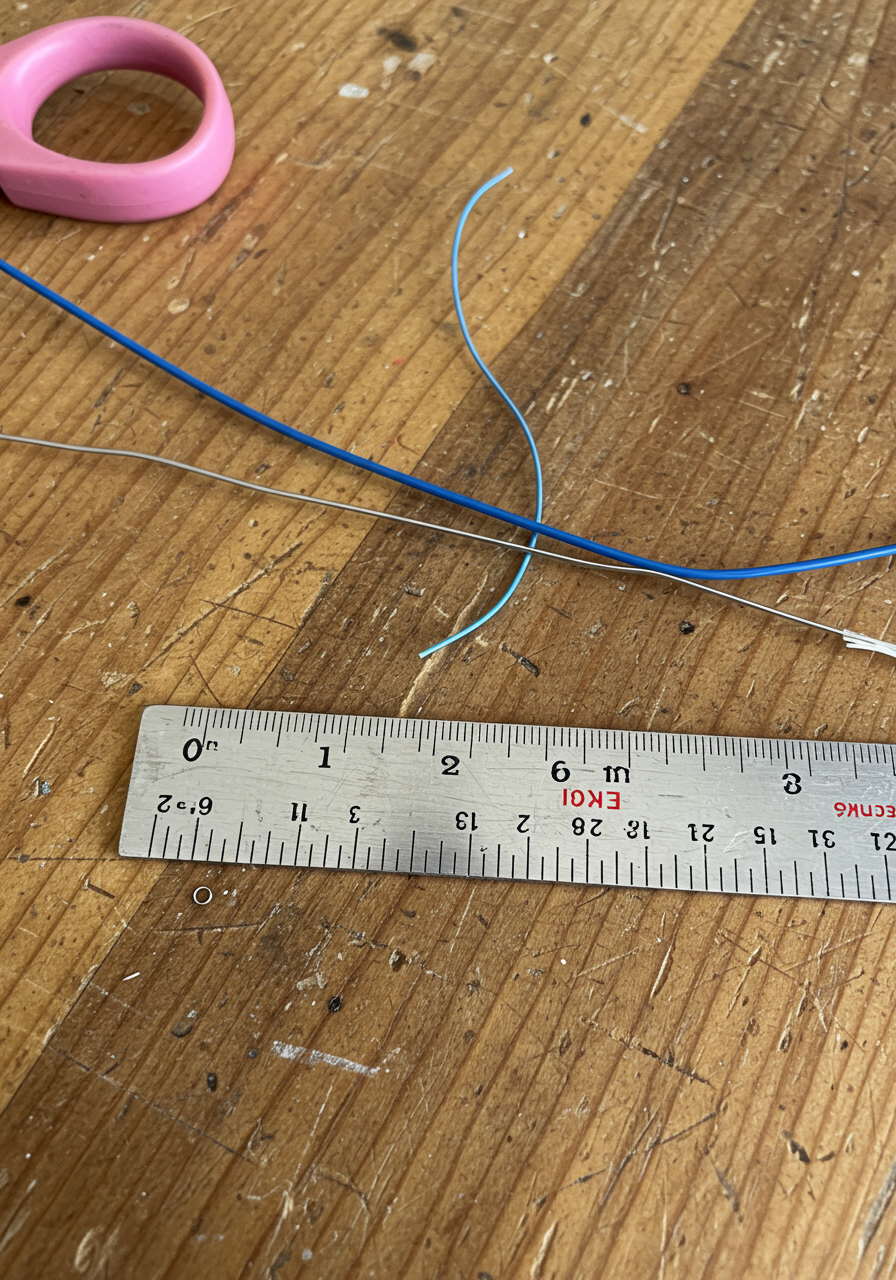
NOSE PIECE:
For the nose piece, I am using twist ties from the hardware store cut to 4 inches and zig-zagged onto the front of the make.
Here's a quick video of that process.
I keep tweaking this process as I go to make it go faster but this is an easy method that anyone can do at home!
Here is a super long, very amateur video by my son Leo of me making a mask start to finish.
Kerry makes it her priority to provide each and every client with dedicated personal service coupled with in-depth market knowledge, experience, and the tenacity to deliver the most favorable terms and best possible price.
Let's ConnectCompass
8204 Germantown Avenue Philadelphia, PA 19118